Azure Managed Identity: Authorize Service-to-Service Requests
I recently came across a scenario where I needed to authorize http requests between an azure function and an azure web app. Azure Managed Identity provides a secure and structured method for granting this access with very little custom auth code required.
Find the full source code on GitHub.
This tutorial assumes you have the following resources provisioned in Azure:
- An App Service
- An Azure Function App
System Architecture
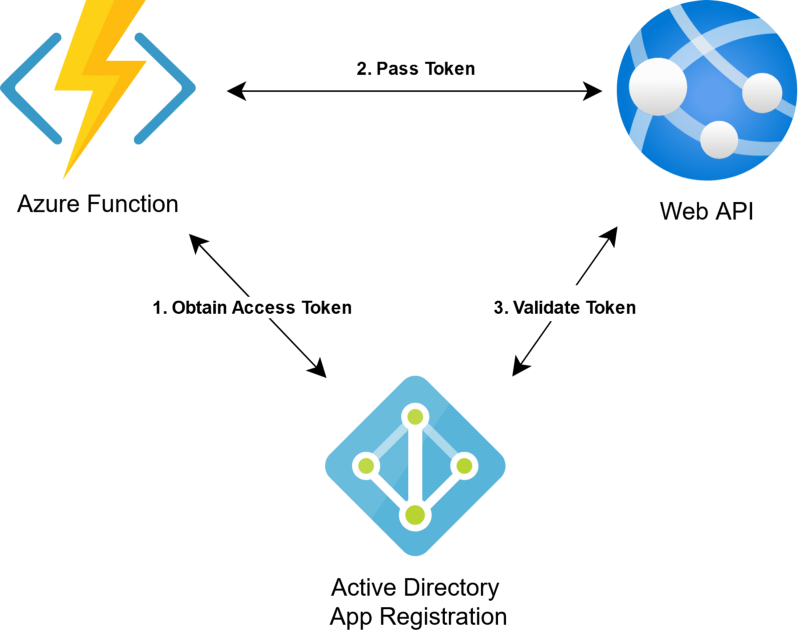
The flow for this solution follows these steps:
- Azure function obtains a JWT bearer token from our Azure AD app registration
- Azure function provides the bearer token when making http requests to the web API
- Web API validates the authenticity of the access token and reads JWT claims
Tutorial
Creating the Azure AD App Registration
Before we can authenticate our applications, we first need an AD app registration to delegate our permissions and role assignments.
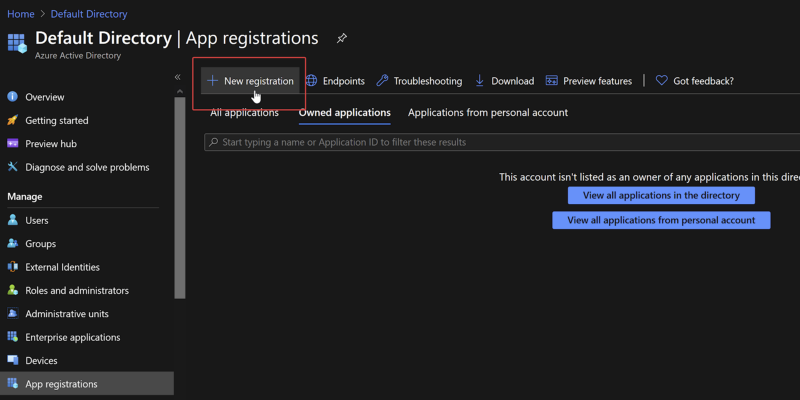
Feel free to name this app registration anything appropriate. For this demo I named it demo-web-api. Next we need to define the roles to be delegated. In this scenario we will create 2 roles for demonstration purposes: Data Reader and Data Writer. We can manage these roles in the "App roles" blade within our app registration. For service-to-service authorization, we can limit the allowed member types to just applications. If you would like to use this app registration to manage roles for user of the app, you can select one of the Users/Groups options.
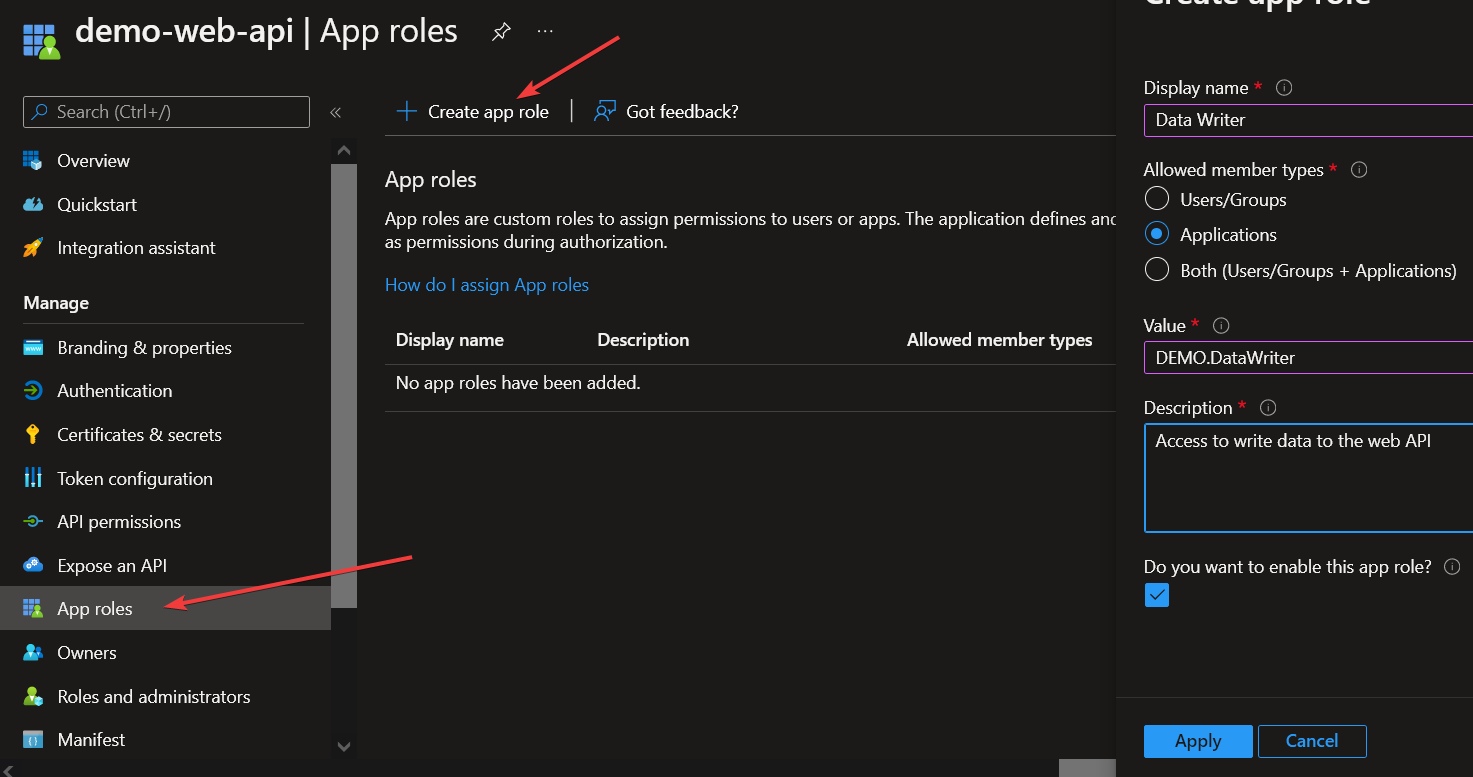
Once created, your roles should look something like the following.

Take note of the "ID" values for each role you create, we'll need them shortly. That's all the setup we need for our app registration. We'll come back later to grab a few IDs, but for now we can move on to grant roles to our Azure Function.
Granting Roles
The first step to granting our Azure function access to the web API is to turn on managed service identity (MSI). This gives us an object ID we can use to refer to the function from Azure AD. To turn this on, simply go to the Identity tab under the Azure Function.
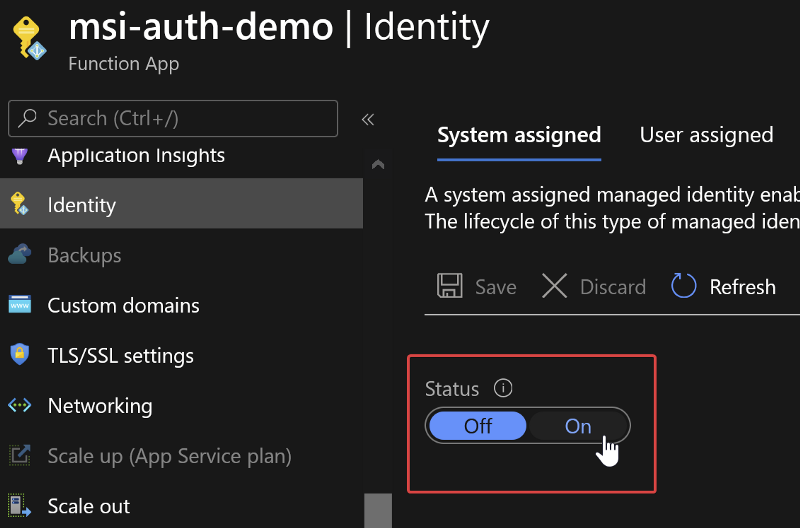
Once MSI auth is on, you can take note of the Object ID displayed. We will need this shortly.
Next we need to grant the role to our Azure Function so it will be returned in the access token provided by the app registration. It would be great if the Azure portal provided a UI for adding Application roles, but unfortunately as of writing this post, the portal only supports granting User roles. For this task, we'll need to use PowerShell.
You will need the following IDs to run the script:
- Tenant Id: Can be found on the overview page of Azure AD.
- Web API Enterprise App Object ID: Can be found at Active Directory -> Enterprise Applications -> Your App Name -> Overview -> Object ID
- Function App Object ID: Created in the previous step, under Function App -> Identity -> Object ID
- Data Reader Role ID: The ID value from creating the Data Reader role earlier
- Data Writer Role ID: The ID value from creating the Data Writer role earlier
Here is the script to assign the roles once you have gathered the IDs you need. You will need the Azure PowerShell Module to run this. You may also need to install the AzureAD powershell module separately.
Once the script completes, we can check that the roles were assigned properly by navigating to our Enterprise App Registration and viewing the role assignments.
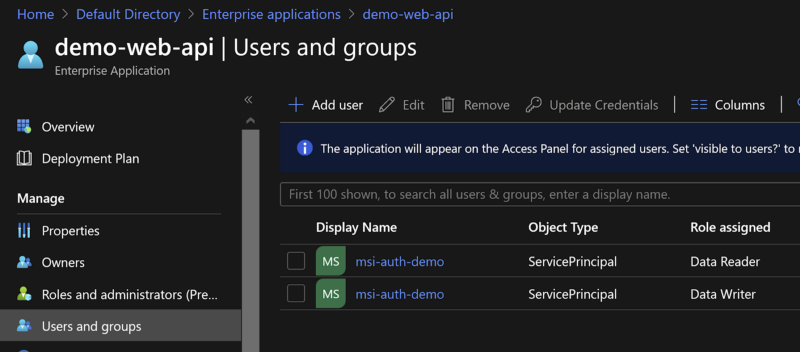
Now we're ready to utilize these roles for access control.
Creating the Web API
We will next create a simple web API project and configure it to use the app registration we created earlier to handle authentication.
To create the web API project, we can run the following command
dotnet new webapi We will also need the JwtBearer nuget package to help us configure the authentication.
dotnet add package Microsoft.AspNetCore.Authentication.JwtBearer Next, we need to modify the Startup.cs file to include our authentication/authorization setup. First modify the ConfigureServices method to set up our JWT authentication:
We also need to add our Authentication/Authorization to the Configure method to have the web app use what we have set up so far:
IMPORTANT NOTE: The order of these app.Use() calls is key.
Once those pieces are in place in Startup.cs, we are ready to authenticate and authorize the requests we receive. Here is a demo controller we can use to test the enforcement of our read and write roles we created earlier.
Creating the Azure Function
Now that our web API is set up, we can create a simple function app to test that our roles and access have been assigned properly. We can start by initializing a new function app.
func init az-func --dotnet To obtain and manage our API access tokens, we can install the app authentication nuget package.
dotnet add package Microsoft.Azure.Services.AppAuthentication Once our function app project is created, we can create a simple HTTP triggered function to test out our access to the web API.
Here is a breakdown of what happens in this function:
- We create an Azure service token provider and use it to obtain an access token (JWT) for our web API app registration, based on the client ID.
- We create a request to our web API, with the bearer token added to the request headers.
- We send the request and get a message back from the web API, meaning we have successfully authenticated. If our authentication had failed, we would receive a 401 response code.
Once our function app has been deployed to Azure, we can test it out. Here is the message returned from our hosted Azure Function, including the result of our web API call:

Inspecting the JWT to Help Debug Issues
The JWT returned by our Azure AD app registration can be inspected using various JWT tools. You will likely need to remote debug your function app to grab this value, or you can create a dummy function to return the JWT value (this would expose the JWT to the public, so it should only be done for initial testing/setup). Inspecting the JWT can be a good sanity check to make sure that our roles and client ID are correctly configured. Below is an example of what you may see if you plug in your JWT to https://jwt.io
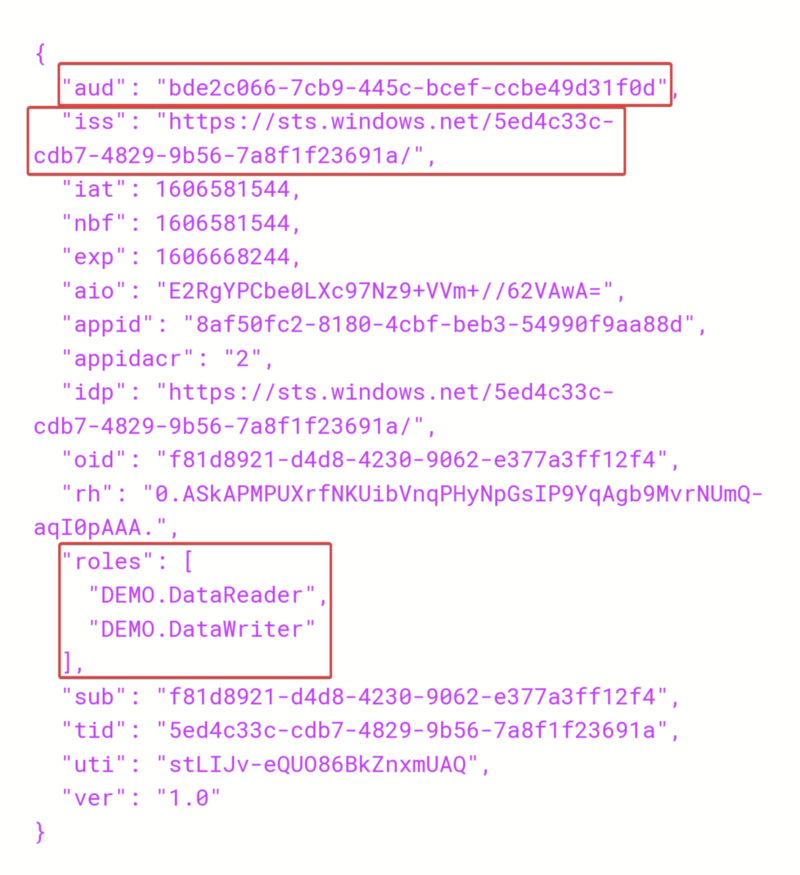
The "aud" field here should match the value of your app registration client ID.
The "iss" field should end with the tenant ID of your AD tenant.
The "roles" list should include the roles we assigned to our Azure Function using PowerShell.
. . .
Wrap Up
Now you know how to secure service to service requests using Azure Managed Identity. This tutorial used an azure function as the client application, but any Azure service that can use managed identity can leverage this method (e.g. another App Service).